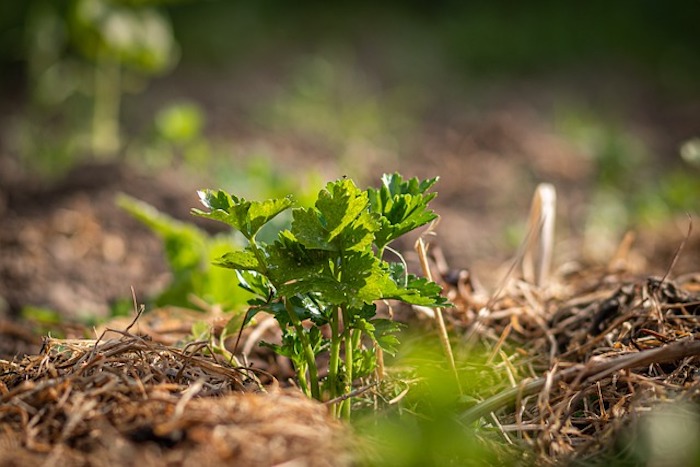
Spreading mulch in spring can inhibit weed growth. Applying it in the fall can protect your plants through the harsh winter season.
Spreading mulch is one of my favourite farm chores. I love the way mulch smells and feels and looks. That moment my pitchfork pierces the heaping mound of leftover grass and leaves and steam spirals up into the cool morning air. The way the strong, lingering scent of cedar follows me home after a day spent spreading wood chips. The satisfying look of a tidy, weed-free field after I’ve laid down a sea of straw to cover the endless rows of potatoes and garlic. I even appreciate the sogginess of cardboard left out in the rain before it’s used to fight weeds along my garden paths.
Mulch is any material, synthetic or organic, spread over the ground as a covering. Mulch can be leaves, wood chips, newspaper, pebbles or even plastic and polyester fabrics – basically, anything that stays in place and protects the soil. The protective layer it provides keeps the soil cool and moist in the summer and insulates tender perennials in the winter.
“My favorite mulching superpower is its ability to support a healthy ecosystem under your feet.”
Mulch is a champion at smothering weeds, which saves time and energy for us hardworking gardeners. Every spring, I spread two to four inches of mulch on my garden beds to prevent new weeds from growing near my vegetables and perennials. For really overgrown areas, I use damp cardboard as a barrier and cover it with a generous layer of mulch, which is usually enough to knock out even the gnarliest weeds.
My favourite mulching superpower is its ability to support a healthy ecosystem under your feet, which benefits your crops and the planet. Natural mulches are high in carbon, which soil organisms, such as microbes and fungi, need to survive. These organisms feed on the mulch, breaking it down and releasing essential nutrients that plants absorb as they grow.
Plants pull carbon out of the air to form sugars used to fuel cellular activity. Any excess sugar is released through roots to support soil organisms in exchange for access to nutrients. The alliance between plants and soil organisms locks carbon underground as humus, the dark soil that every gardener lusts over, thus lowering the amount of carbon in the atmosphere.
Mulch can be applied anytime of the year, but you’ll see the greatest benefits if you do it in mid-spring or fall.
A layer of straw protects the soil from light frosts and helps to insulate late fall plantings of mustard, lettuce, and kale.
THE BENEFITS OF SPRING MULCH
Mulching in the spring prevents weeds from growing, adds nutrients, and helps your soil retain moisture.
WHAT TO USE IN SPRING: My go-to spring mulch is a 50/50 mix of shredded leaves and grass clippings because I always have a lot of yard waste. Shoveling leaves and grass onto your plant beds feeds the soil with nutrients well into the fall without having to turn over the compost pile. If you don’t have a steady supply of yard waste, consider asking your friends and family to save theirs. Another option is to find some hay to use – old, slightly decomposed hay makes for a great spring mulch in the absence of yard waste. If all else fails, you can always buy mulch online or at your local home and garden store.
THE BENEFITS OF FALL MULCH
Laying down a protective layer of straw before winter can prevent the pounding rain and winds from washing away fertile topsoil. Straw has the added bonus of insulating plants from the freezing cold. Mulching is kind of like tucking in your plants to keep them safe against rain, sleet, and snow.
WHAT TO USE IN THE FALL: I spread a layer of coarse wood chips over my garden paths each fall. Coarse materials like wood chips act as a cushion to protect the soil from being packed down by winter storms. You don’t want compacted, poorly aerated soil because it’s unable to absorb rainwater, hold nutrients, and support healthy microbial activity and root development.
A layer of mulch covering the compost pile helps to keep it weed free all season.
APPLYING MULCH
START BY WEEDING. Before spreading your first layer of mulch, take the time to thoroughly weed your garden beds. Mulch is effective at discouraging weed growth, but it can’t do much to kill weeds that are already well established. This task might seem daunting but think of it this way—after a few seasons of mulching, there won’t be any more weeds to pull.
You can also lay down a black plastic tarp over the ground you want to clear, and secure it with stakes. The dark plastic warms the soil so intensely it not only kills living weeds but also the seeds on the soil surface. This method also allows you to avoid disturbing the soil. Before you lay down the plastic, which you can buy from any online farm store, rake compost into the first inch of soil. If you have plants growing in the bed, simply put the compost on top of the plants. If it’s the late fall, winter, or early spring you’ll need to wait six to 10 weeks before removing the plastic. If it’s warm outside, say the late spring through early fall, you don’t have to leave the tarp on as long. Two to six weeks should be enough time to suffocate the weeds.
A third option is to use so-called lasagna mulching, where you layer cardboard, seaweed, leaves, grass, and repeat. I prefer this option because it not only kills weeds but builds soil. Seaweed adds over 50 minerals and plenty of available nitrogen, potassium, and phosphorus to the soil, a potent mix of good stuff that helps plants thrive, but this method still works even if you can’t get your hands on some.
PREP THE SOIL. Mix compost into the first few inches of your soil to add nutrients and encourage your plants to grow strong and healthy. Then soak the ground. After the first good soak, the soil stays damp longer, sharply reducing the amount of water you’ll need for the rest of the summer. In arid climates, mulching in the spring is the single best thing you can do for your plants.
Another good reason to soak your soil is because organic mulches absorb a lot of water and end up stealing it from plants if there’s not enough to go around. I’ve accidentally tortured freshly planted kale because I forgot to saturate the soil before layering on my straw. After watching my kale wither, I pushed aside the mulch to see what was going on and found my soil bone dry. Lesson learned.
SPREAD YOUR MULCH. Load a wheelbarrow or garden cart with your favorite mulch. Scoop mounds of it onto your garden bed every few feet. Use a rake to smooth out the piles. What you want is an even layer of mulch, two to four inches thick. Don’t overdo it! Spreading too much mulch makes it hard for rain to hydrate the soil.
You also don’t want to mulch too closely to the root crowns and stems of your plants, or you may produce rot. I aim for a distance of two inches. For larger perennials and trees, I keep mulch at least eight inches from their base. In the spring, I push mulch away from the base of my perennials to prevent decay and give my plants a head start into the new growing season.
One problem with mulch: It can attract pests. Rodents love its insulating powers and burrow into it to stay cozy during cold snaps. Mulch also hides slugs and snails that gnaw on vulnerable leaves in the coolness of night. If you have trouble with pests, avoid putting thick layers of mulch down in the fall.
I spread a layer of coarse wood chips over my paths each fall because the coarse material acts as a cushion to protect the soil from being packed down.
CHOOSE YOUR MULCH
When choosing the right material, I always consider what’s affordable, available and appropriate for the task at hand. Are you mulching for weeds, warmth, aesthetic value, or water retention? I use different mulches for different jobs throughout the garden.
As a rule, I only use organic mulches that persistently work to improve the health of the soil, that is, materials that are broken down by soil microbes to increase organic matter. I shy away from synthetic mulches like landscape fabric because they do nothing for soil health and create more waste for the landfill.
Not sure which mulch is right for you? Here are my favorites:
STRAW OR HAY
-
Benefits: Best used to insulate perennials during the winter months.
-
Drawbacks: Cheap hay is filled with weed seeds that can take over your garden
-
Bottomline: Buy the same quality of hay or straw that is used for feed and weeds shouldn’t be a problem.
GRASS
-
Benefits: Great for adding nutrients, particularly phosphorus, to the soil.
-
Drawbacks: It can get hot enough to kill your plants when left in clumps more than one inch thick.
-
Bottomline: Use thin layers of grass to add nutrients and avoid suffocating your plants.
COCO FIBER
-
Benefits: Lightweight and easy to handle. It’s also a great source of phosphorus.
-
Drawbacks: Expensive and the high nutrient content makes it toxic to pets.
-
Bottomline: I only use it in the greenhouse for seedlings. The expense and potential hazard outweigh its benefit in the garden.
LEAVES
-
Benefits: You can find nearly an endless supply in the fall. Ask your friends to save them too!
-
Drawbacks: Whole, dry leaves can mat together and prevent water from reaching the soil.
-
Bottomline: Leaves are amazing if they are shredded by a mower or left to dry out and crumbled.
GRAVEL OR PEBBLES
-
Benefits: Perfect for plants that need drainage. Rocks also absorb heat during the day and release it during the night, which protects cold-sensitive plants.
-
Drawbacks: Pebbles can be messy and make it hard to dig.
-
Bottomline: Save the pebbles for your succulent garden or planters.
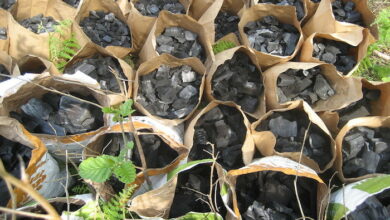
WOOD CHIPS OR BARK
-
Benefits: Easy to get from your local utility company. They also slowly decompose so you won’t have to replace as often.
-
Drawbacks: High carbon content can steal nutrients from the soil surface. Mulches like wood chips, straw and sawdust are high in carbon and low in nitrogen. When soil microbes eat the mulch, they pull all of the available nitrogen from the soil surface in order to break down the woody materials. This creates a localized nutrient deficiency around plant roots. I offset this by mixing in a high nitrogen fertilizer, such as blood meal or fish meal, when I apply woody mulches.
-
Bottomline: Save the bark for pathways and areas that see a lot of foot traffic.
NEWSPAPER OR CARDBOARD
-
Benefits: Abundant in today’s age of Amazon packages arriving almost daily. A great alternative to weed fabric.
-
Drawbacks: Some inks and glues contain toxic chemicals.
-
Bottomline: Most inks are soy based so they are safe for the garden. Avoid using glossy paper or boxes coated in colored inks.
SAWDUST
-
Benefits: Very inexpensive because it is a waste product.
-
Drawbacks: Very acidic and messy
-
Bottomline: Use sawdust only around your acid-loving perennials, like blueberries.

Acadia Tucker is a regenerative farmer, climate activist, and author of Growing Perennial Foods, Growing Good Food, and Tiny Victory Gardens. She currently lives in Maine and New Hampshire with her farm dog, Nimbus. When she isn’t raising perennials in her own backyard, she grows hops to support locally sourced craft beer in New England.